Thanks for stopping by at my blog today. I have had blogger issues this
week that I think a lot of you have also had, so apologies if I missed a post by
you. Also. my mojo has been at an all time low recently....don’t you just hate
when that happens. So for my Cheery Lynn Design post I decided to play along
with their Wedding Theme Challenge and I was soon back on track.
I decided to make a 6x6 card and thought it would be nice to have colours
resembling the bride, groom and bridesmaid on my card, so I chose White, Grey
and Lavender to work with. I cut out my French Lattice die twice in grey card
and pieced them together to fit over my lavender paper to form a square. When
doing this I found it easier to have my lilac paper cut roughly to the size I
needed. I then worked out where my crosses matched best to make my join and
re-align the 2 pieces together and glued onto my lilac card, finally
trimming around the edges. My topper is two stamps stamped onto a pearlised
linen card and die cut out with a little grey card mounted behind to make the
design POP.

You will see I have used my Cuties Strip around my card. The die makes
gorgeous flowers but is also great to use as accents onto your card. I die cut
out in white card and inked the edges with a lavender shade. On the reverse of
the paper I pressed my embossing tool into each petal, this gives a little more
dimension to your card as doesn’t look flat when glued on.
I placed the Victorian Flourish die onto my card and used a couple of the
waste pieces onto my design too. My miniature roses were cut out from linen card
and when the glue had dried I rubbed over some lavender ink. Everything was
placed onto my card along with my final touches of bling.
Hope you have a lovely weekend and get some time to be creative.
Julie x
Shop at Cheery Lynn for -
Hello there my Blogging friends, where does time fly to, I can't believe we have almost been home a week from our break in Majorca, but the good news is I think we brought the sunshine home with us as it has been the most beautiful week here in Scotland.
Yesterday I went around our local Garden Centre with my Mum and at this time of year it's full of so much inspiration seeing all the gorgeous flowers in full bloom. I am still playing catch up trying to visit everyone's blog so please bear with me.
This week for my DT post at Cheery Lynn Designs is a card for a Birthday which would be suitable for a variety of occasions by simply changing the wording with Cheery Lynn word dies.
My flowers were cut out using white cardstock and inked to shade them. I
layered various leaves and my tiny flourishes to form an arrangement on my card.
My doily I also inked and added the Angel wing die offset to the back of the
doily to make everything POP. You will see my Border strip was also inked in two
shades and matches my Doily.
Hope you all have a beautiful sunny weekend wherever you may be. Thanks to
everyone who left comments on my last card while I was on Holiday, much
appreciated.
Julie x
Shop at Cheery Lynn for-
Hello there Blogging friends.
This is a scheduled post for my DT at Cheery Lynn Designs, as I am on holiday at present. This week I thought I would make an
Easel card using one of the Reflections Boutique Mega Dies. These are really
clever dies as they give you scope for cutting out many different sizes. They
also cut out 2 layers of cardstock with ease so you can make shaped
cards.
My flowers and doilies were cut out using white cardstock and inked. I
added flowersoft into the centres of my flowers. I used the Cuties 3 strip
curled around my image.
Looking forward to catching up with all your blogs when I’m back home.
Take Care,
Julie x
Shop at Cheery Lynn for –
Hello there Blogging friends and also a warm welcome to my new followers.
This week for my DT at Cheery Lynn Designs I combined our challenge of red,
white and blue into my card.
I matted and layered my seaside themed papers using the stacker dies, to
make them look like a picture frame with a little scene inside. I used the new
Old Barn Board die which comes with the words, log and fishing line. The log was
cut out in Kraft paper and I distressed the edges, I placed a few foam pads in
the middle and glue at the edges this added more dimension to my card. My
stamped image had a fishing line on it, which I cut off. You will see the
extended bit on my fishing line is now made using my die, don’t you just love
the little hook on the end of this. I pressed the hook into my embossing ink and
double embossed using silver embossing powder and threaded a few beads through
it to give a 3D look of a float on the line.
My birds are from the birdbath set and my little Starfish was made using
the leaves from the miniature rose die.
I am off to sunny Majorca for a week, my daughter works in the Airline
Industry so nice cheap flights, we couldn’t say no to, so my post next week will
be a scheduled one. Look forward to catching up with all your blogs when I get
back.
Thanks for popping by my blog and enjoy your weekend.
Julie x
Shop at Cheery Lynn for –
Hello my blogging friends. Today I am delighted to be sharing my post along
with Country View Crafts. I won my Guest Design spot with their challenge last
month New Beginnings, you can see my post here.
When Chris sent me the theme Only Men Allowed for my project I must admit I
initially panicked a bit and thought I don’t do men things... So this was a big
challenge to me, but I do love a Challenge. It took me about 2 days and
probably nights thinking what I was going to do and then I remembered the
Opening Ceremony at the Olympic Games and the part where they went through
the Industrial Revolution and it all looking very masculine and the men standing
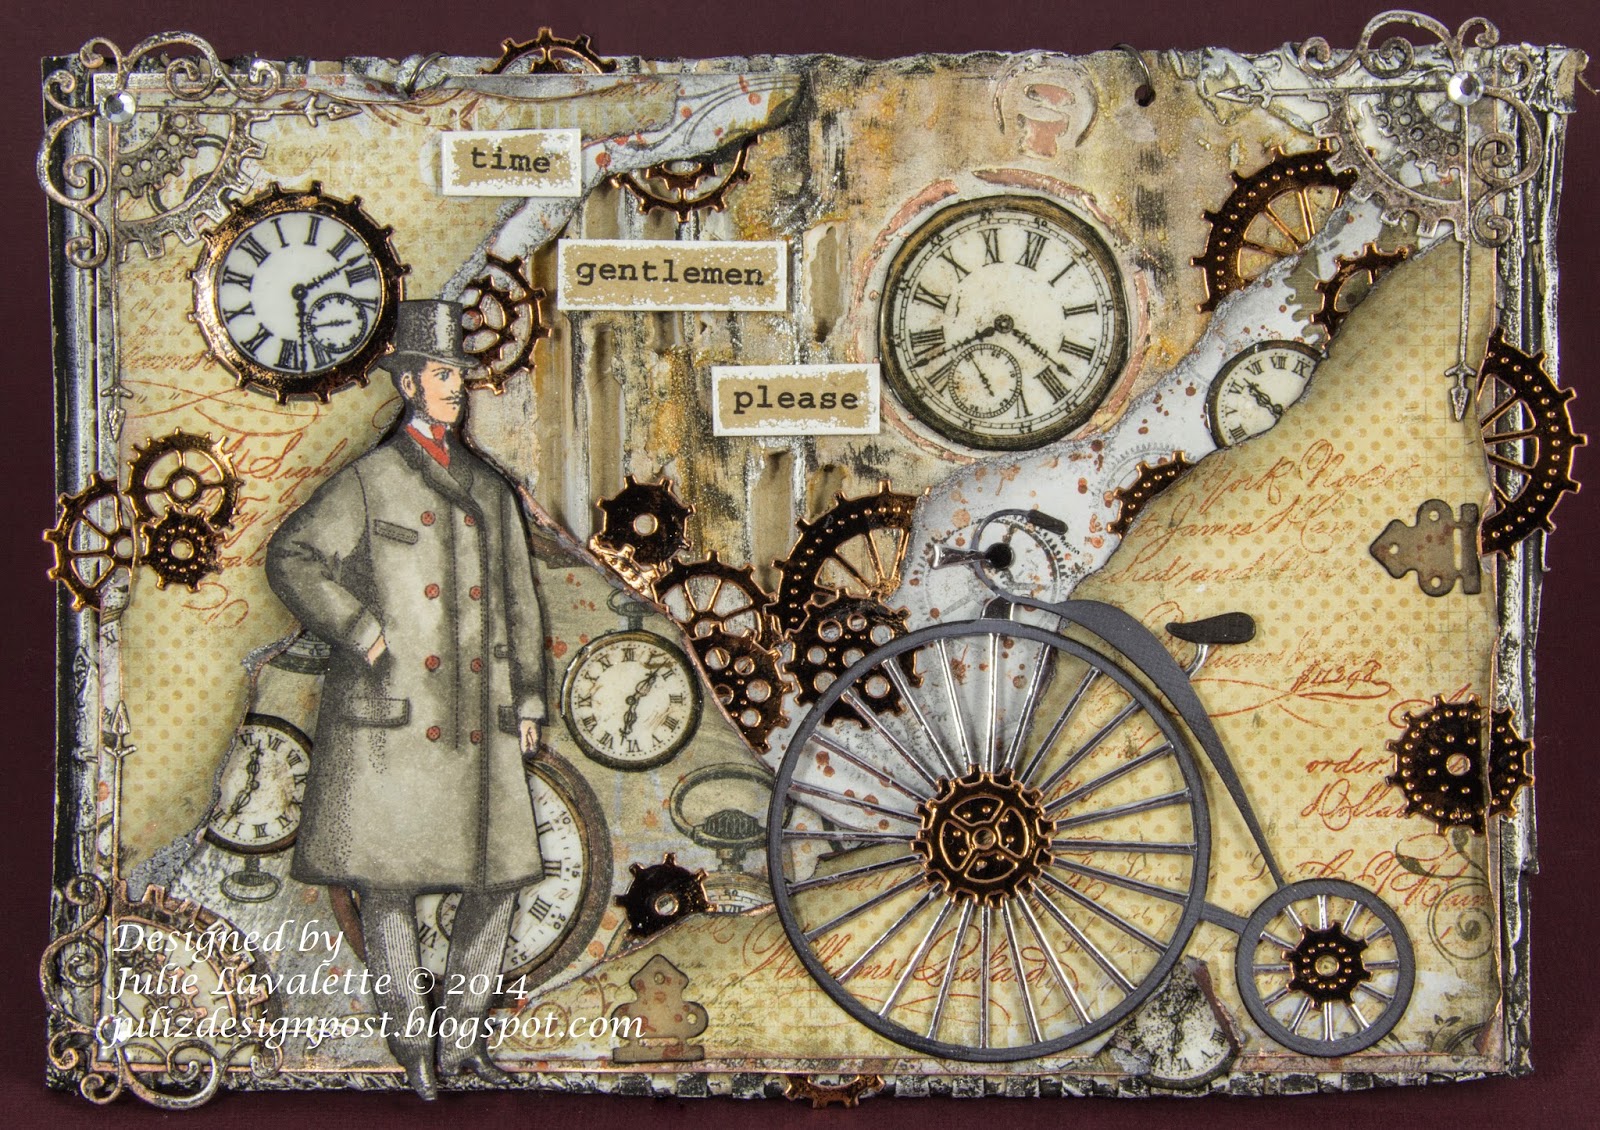
with their Top Hats on. I now had an idea and started to plan my project.

I wanted to give my project depth with lots of layers so it gave the
impression you were peeling back the years through History and stepping back in
time. I started off by ripping some layers off a piece of cardboard to reveal
the corrugation and sealed with a coat of Gesso. Next I used a little
texture paste applied with a palette knife on the edges and through a clock
stencil onto my cardboard.
Using another 3 sheets of paper from my pad I tore these sheets, inked the
edges, applied some stamping with Archival Ink and adding a little frantage and
gilding wax. I next sprayed a little water on the reverse to curl my paper and
dried with the heat gun.

I fussy cut out various clocks from my BoBunny Timepiece collection and stamped a couple then gave them a coat of glossy accents and layered them on to my project. My
Gentleman was stamped , coloured with copics and fussy cut. The stamp was free
with a magazine.
My die-cuts are all Cheery Lynn. The cogs were cut out in rose gold mirri
card and I inked the edges with Stazon. My Steampunk corners were cut from
silver mirri card, a little black gesso and gilding wax was applied. My Penny
Farthing was cut out in Black card and mirri card. I paper pieced the layers
together.
My words were computer generated and printed onto Kraft paper, I then
double embossed the edges with white embossing powder. I finally added a little
metal chain to the top to hang it.
Thanks for having me over at Country View Challenges and taking the time to
visit my blog. I hope you all have enjoyed my project as much as I did in making
it and I'd love if you left me a comment.
Julie x
Products Used -
Archival Ink black, Stazon Ink rusty Brown, Distress Ink black soot, rusty
hinge. Copics, Bo bunny paper, Clock stamps, glossy accents, Treasure Gold rose
quartz, Black and white gesso, silver, gold and rose mirri
card, Prima clock stencil, Paper Artsy grunge
paste..
Cheery Lynn Dies Used -
Vintage Bicycle
Gears (Set of 9)
Steampunk Corner (Left & Right)
Hinges
I would like to enter this in to :
It's All About Vintage -Use Dies Challenge
Frilly and Funkie - For all our Fathers Challenge
Rheddscreative Spirit - June Challenge
Fashionable Stamping Challenge - #73 Like Clockwork
Thats Crafty - It's all about Texture Challenge
01
09
10