Translator

Wednesday 30 March 2016

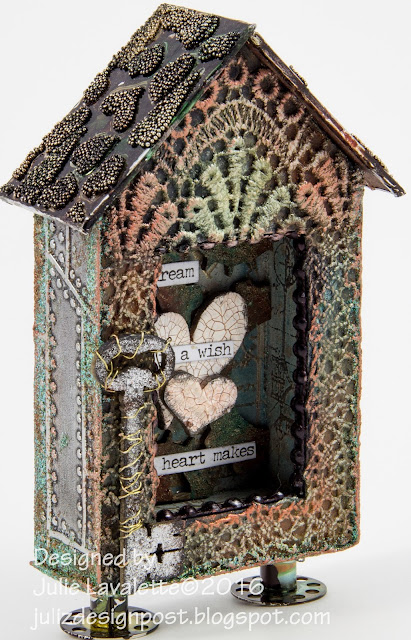
Steampunk Shrine Tutorial


Hi Everyone,

Today I am sharing my tutorial on my Steampunk Shrine at That Craft Place. Sadly this will be my last tutorial post as DT on this blog as they have decided to take an extra long holiday at present.

If you have followed my blog through That Craft Place and would like to continue to follow me, please link up on one of my follow buttons on the sidebar and leave me a comment, so I can also link up to follow your blog.

Crafty Hugs, 
Julie x

Sunday 27 March 2016

Steampunk Shrine


Hi Everyone, Today we have the start of another challenge at That Craft Place called Anything Goes. Please head over HERE to see all my Teamies fab projects and to hear the news we have to share.


I just have some photos to share today as I will have a full tutorial up later on in the week over at That Craft Place.


Thanks for stopping by today and for your continued comments, which I love reading.


Julie x

Links you need to know.

Saturday 26 March 2016

Happy Easter


Happy Easter Weekend to all my lovely followers and thank you so much for the comments on my Springtime card, I was overwhelmed with all your kind words. Today for my DT post at Cheery Lynn Designs I decided to make a Spring card filled with Easter inspiration.


I started by layering 2 layers of paper onto my base card adding Stickles at the edge for a touch of sparkle. I layered on part of my doily as an accent, this helped my Basket pop from the design against the busy floral paper.


My Happy Easter was layered twice for a shadow effect, adding my branches and flowers which had been shaded with Copics.


My sweet Easter Chicks were shaded with Distress Inks. I coloured their feet and beaks with Copics and finished them by adding a little black liquid pearls onto their eye. Mounting them onto the Grass Border Strip.


My Basket I die cut in purple cardstock and then used our Special Effects technique demonstrated HERE to get the background. Layering in my Eggs with a touch of Silicone Glue and adding a little Satin Bow.

Thanks for stopping by today and good luck to everyone entering the Cheery Lynn Designs Current Challenge - Anything Goes.

Crafty Hugs, 
Julie x 

Shop at Cheery Lynn Designs for:

Thursday 24 March 2016

Cheery Lynn Designs Blog Hop introducing IOE Plates


Hello there and welcome to our latest blog hop at Cheery Lynn Designs. We are all excited to be showcasing with you the new IOE Plates, where you decide what part of your embossing folder you want to emboss. You can also mix and match your embossing folders to make endless designs. All the info is HERE and clearly explained on a video link about these amazing plates.

I am first on the blog hop, so at the end of my post please just click on Lisa's name to carry on hopping.

It was the Spring Equinox here in the UK at the weekend so I thought it would be nice to share a Vintage Springtime Card.


My Pocket Watch I coloured with Copic Pens and mounted onto my Angel Wing which had been given three layers of Pearlised Embossing Powder. Once glued in place I reheated my Embossing Powder to give the illusion of my numbers being set into the Pearl background similar to on a watch.


Finishing off my card with a sweet little Bunny and his cotton tail.

I'd love if you leave me a comment to let me know you have stopped by on our BLOG HOP and be sure to head over to your next stop LISA, to see her amazing card.

Hope you get the chance to follow through to the end of this hop where you will see how versatile these IOE Plates are as you see my Teamies beautiful cards. Leaving a final comment at Cheery Lynn Designs Blog for a chance to win a gift certificate for $20 to spend in their shop. Good Luck.

Thanks so much for stopping by today.

Happy Crafting to all,

Julie x

Cheery Lynn Products Used :


I wish to enter this in to the following Challenges:


Tuesday 22 March 2016

Easter Bunny


Hi Everyone, we have had some lovely sunshine in Scotland over the past few days, a refreshing change, hopefully spring is here now. For my DT post today with Craft Consortium I am sharing some Easter inspiration.


I started with a polystyrene rabbit which I covered using their Summer Garden Decoupage paper, I tore approx 1.5 inch pieces and glued on with Mod Podge Matt.


My bow was made with my bow maker and Mauve coloured ribbon.


I made the small handbag using paper from the Wild Rose Collection adding a handmade flower, a pearl beaded handle and my cute Easter Chick for a quirky touch.

Many thanks for stopping by today and be sure to check out Craft Consortium to see their full range and on Facebook for inspiration and regular giveaways, you will also find them on Pinterest, Twitter and Instagram.

Crafty Hugs,
Julie x

Craft Consortium Products Used :


Cheery Lynn Dies Used:


Monday 21 March 2016

Vintage Family Memories


Hi there, I hope you all had a lovely weekend. Today I am over at That Craft Place with a Tutorial on the techniques used on my Vintage Family Memories Frame.

Would be lovely to have you hop over HERE.


Crafty Hugs
Julie x

Saturday 19 March 2016

Wedding Memories


Hello fellow bloggers, I hope you are having a lovely weekend creating. Today for my DT post at Cheery Lynn Designs I am sharing my Wedding Memory card that would look equally as good in a Scrapbook layout using the larger die in this Film Set collection.


I started off using my Stacker dies for my layered background. Next my heart was heat embossed with an Aged Bronze and I cut it in half to layer on and extend its size so it fitted perfectly as a background accent.


My black paper accents were made using a section from Sophia's Heart Border. On top of this I added 2 torn layers of paper which I heat embossed with Aged Bronze at the edges to compliment my heart.


My Film Set die I placed over my images and die cut to obtain the perfect size to reinsert into my frames. I heat embossed my images with Clear powder to look like a glossy photo.

Thanks so much for stopping by today and I do hope you get a chance to join in the new challenge at Cheery Lynn which is Anything Goes
Julie x

Shop at Cheery Lynn for:

Thursday 17 March 2016

Floral Garden


Hi Everyone, Today for my DT post with Craft Consortium I am sharing another card using the beautiful eclectic paper pad called Gypsy Gypsy.


I cut out a 6x6 section from one of the 12x12 sheets and fussy cut around some of the flowers, inking them at the edges and inserting into the paper, my postcard and Peacocks Feather. I also added a few die cut flowers and leaves to compliment the paper.


My main image was fussy cut from an eclectic sheet in the pad and tattered at the edges, layering onto a little cheesecloth. I added a little Stickles for added sparkle to her necklace and crown. Layering onto a Gold Heat Embossed frame with a couple of layers behind to make this POP.


Finishing my card off with a few gems, a little strip of lace at the edge of the card and a key.

Many thanks for stopping by today and be sure to check out Craft Consortium to see their full range and on Facebook for inspiration and regular giveaways, you will also find them on Pinterest, Twitter and Instagram.

Crafty Hugs, 
Julie x

Craft Consortium Products Used:


Cheery Lynn Dies Used

Sunday 13 March 2016

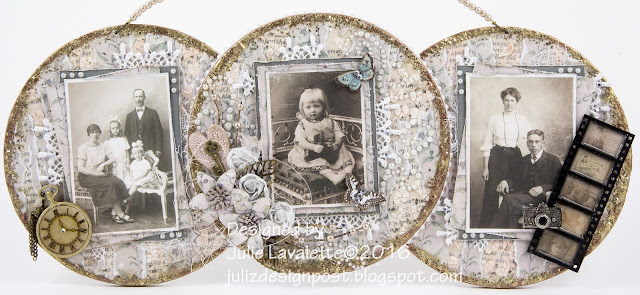
Vintage Family Memories


Hi Everyone, Today at That Craft Place we start a new fortnightly challenge of Anything Goes.
I have made an MDF wall hanging ( 13" x 5.5" Approx ) which I shall be sharing a tutorial on shortly over at That Craft Place, using lots of goodies from Lisa's amazing shop.
So for today I will just share some close up photographs.


Thanks for your continued comments and I do hope to be well enough to catch up with your blogs soon.

Please hop over Here to see all the fab projects from my Teamies and I have also listed all the links that may be of interest to you.

Crafty Hugs,
Julie x


Links you need to know.

Saturday 12 March 2016

Easter Cupcake Baskets


Hi everyone, I'm so sorry I have fallen behind with visiting your lovely blogs recently but I am struggling with the glare off my IPad at present so it means I am only on for a limited time. Today for my DT post at Cheery Lynn Designs I am sharing with you some Easter Inspiration using their fab new Cupcake die.


These cute little baskets which measure approx 3" diameter by 4" height are easy to make and once I worked out all the measurements it didn't take long to make the second one. So let me show you how to make them.


I started by cutting my Cupcake Wrapper from cardstock and added a double layer of grass to the base. To get the grass strip to curve around your cupcake die, layer on sections measuring about 2 inches in length, offsetting the grass on each layer.


For my base I used the 2 largest dies in the Circle Classic set. You will see in this photo I cut my die out and then drew around the outer part of my smaller die and fussy cut in some notches.


My Cupcake Wrapper I added a little bit of glue to the die cut join for added strength for the weight of my chocolate eggs and formed the shape of my cupcake. I then bent all my notches up on my circle and added a little glue to each one, pushing my circle down into my cupcake to form the base of my basket, pressing all the notches onto my cupcake wrapper. 


This makes it all lovely and neat and the grass disguises the notches on the inside.


Next I added on my handle with some brads, you will notice I have the pretty side of my Brad to the inside of my basket as I hid the closure with a flower on the outside.


Now the fun bit of adding all my Easter Chicks, sweet Bunny and flowers.


I disguised my join on the cupcake wrapper be carefully placing a Chick or Bunny over the join.


I finished off my baskets with a pretty bow and some Chocolate Mini Eggs which had been gathered inside a Cello bag that we normally place our cards into. I tied with some Easter ribbon and a die cut Sweetheart Candy. 


Thanks so much for stopping by today and you still have plenty of time to join in the Cheery Lynn Designs Fortnightly Challenge - Doilies.


Crafty Hugs, 
Julie x 

Shop at Cheery Lynn for:

Saturday 5 March 2016

Happy Mothers Day


Hi Everyone, in the UK this weekend we celebrate Mother's Day, so for my DT card at Cheery Lynn Designs I thought it would be nice to share some inspiration with you all.

B663 - Die Photo 


I used this wonderful newly released Sunflower Die on my card. You will notice on this die cut you get the small seed box that is for the centre of your flower. Detail is always so important to Cheery Lynn and this is why I love their dies so much, as I can get such a realistic look onto my cards with their dies.


I started off my card by cutting out my Stitched Stacker in white cardstock, blending on Distress Inks and adding my stamped sentiment around the edges. Layering onto my brown cardstock , I tattered both layers at the edges for some added texture.


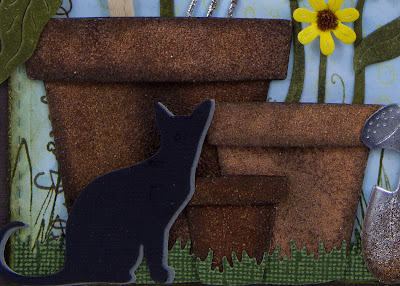
My terracotta pots were each die cut out twice and shaded with a brown Copic pen. I then pressed the die cuts into my Versamark Ink pad and added a mix of Tea Dye and Vintage Photo Distress Powders, heat setting in place. I blended a little Black Archival Ink around the edges and onto the centre for an illusion of them curving. You will also notice I added on an extra layer just to the rim of the pot for an added 3D look. Finishing them off with a little grass at the base.


My Sunflower petals were shaded with a bright yellow Copic pen, with a little touch of a pale orange towards the centre. I shaped 3 flower head layers on my embossing mat and layered them onto my stem and leaves.


On my seed box part of the die I applied a generous amount of glue and poured on some Bronze Micro Beads. Once dry I dripped some Black Alcohol ink on to  it to mimic my seeds. I placed in the centre of my Sunflower and then added some Earth coloured FlowerSoft around the outside of my seed box.


My Watering Can was altered using the same technique as HERE. My gardening spade and fork I coloured the handles with a brown Copic pen and used a peeled paint texture stamp and a little white Acrylic paint so it gave me the effect of the paint peeling off the handles. I used Versamark ink and Silver Embossing Powder on the spade and fork bases. Once this started to melt I sprinkled on a little Vintage Photo Distress Powder and continued to melt it, giving me a rusty worn look. I finished off my spade with a small garden bird.


My card was finished off by adding a Coffee Stirrer into my Terracotta Pot with a stamped sentiment.

I do hope you like my card and feel inspired to try these effects on your die cuts.  Our new Fortnightly Challenge at Cheery Lynn Designs just started on Thursday, this time the theme is Doilies, look forward to seeing your entry.

Thanks for stopping by today and for the continued comments you leave, I love reading them all.

Crafty Hugs,
Julie x

Shop at Cheery Lynn for:


Friday 4 March 2016

A Vintage Journey - DI Travel Bag


Hi Everyone, first of all I would like to say a massive thank you to everyone for stopping by my blog and at A Vintage Journey to see my recent DI Post. I loved reading all your comments.

Can you believe it's our 2nd Birthday at A Vintage Journey this month and Nikki is hosting the Latest Challenge called DI Travel Bag. It's a spin on our Destination Inspiration Posts and this time you get to play with the various items in the Travel Bag. Please check out the blog HERE for full details.

Sorry I don't have a photo tutorial to share, I started this late at night when lighting was awful.


My frame is GreyBoard ( 8"x10" ) and was covered in 3 shades of acrylic paint. I stamped on some text from Tims Papillon set with Archival ink, I then stamped and heat embossed some Copper Cogs.


I scraped Tims Scissors (love these) around the edges of my frame to give a tattered look. I finished off the edges by rubbing Versamark around the edges and heat setting a variety of Embossing powders in place.


My cogs and little strips were all embossed with Distress Powders and a sprinkling of enamel powders in different shades for a rusty look.


My hinges I used Andy Skinners rust technique's on YouTube and added a little Liquid Pearls for nails.


My Deep Red image was stamped in Archival ink onto Speciality Stamping Paper. I shaded her in with my Distress pens and a waterbrush, once dry, I rubbed with my finger some Distress Micro Glaze over my image to protect it. I added some Distress Stains onto my mat and swiped my image through. Once I was happy with the shade on my paper I stamped on some more cogs with Archival ink.


I finished off by arranging all my embellishments and adding some metal details.

Thanks so much for stopping by today and please hop over HERE to A Vintage Journey to see all the amazing projects from my Teamies and full details on our Challenge. Our wonderful sponsor is Andy Skinner, his mixed media creations are sensational - if you are not familiar with his work do check out his Website. Andy has kindly donated a fabulous package to this month's lucky winner which will be made up of his brand new stencils and stamps.

Crafty Hugs,
Julie x

Cheery Lynn Dies Used -


LinkWithin

Related Posts Plugin for WordPress, Blogger...
01 09 10